This guide will allow you to connect to your office PC remotely with a different computer.
NOTE: Remote connection is not applicable on lab computers.
Remote connection is only supported for computers connected to the TAMU network via Ethernet.
Prerequisites:
Connect to TAMU Network:
- On-campus: Connect to the TAMU Wi-Fi network named “tamulink-wpa”.
- Off-campus: Connect to the TAMU Cisco VPN
Necessary Information:
IP address
Username: Your NetID username
Password: Your NetID password
Instructions for Connecting:
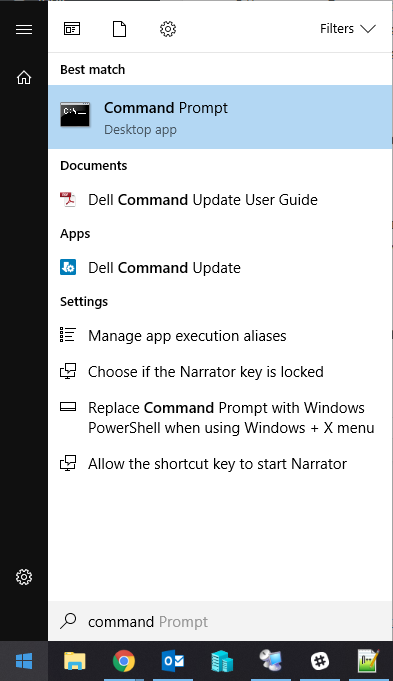
Step 1: On the PC you wish to connect to, open the Command Prompt by searching for the program in the Start Menu.
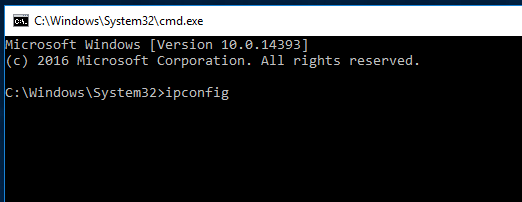
Step 2: Type ipconfig, then press Enter.
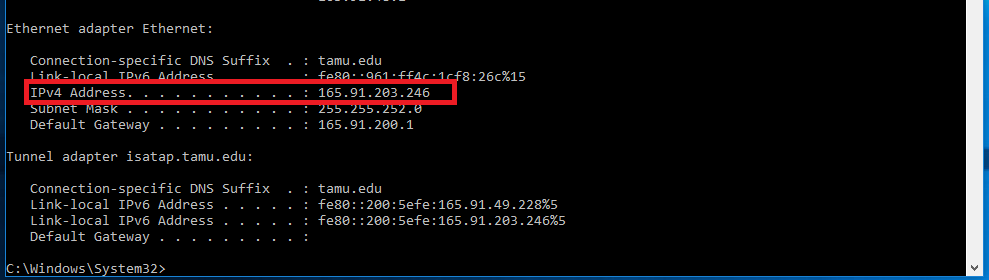
Step 3: Under the Ethernet adapter section, find the IPv4 Address and record the number.
Perform the following actions on the client PC. That is the PC that you are connecting from.
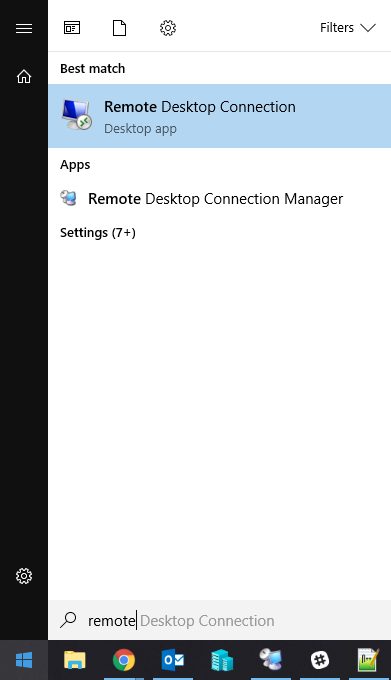
Step 4: Open the Remote Desktop Connection by searching for the program in the Start Menu.
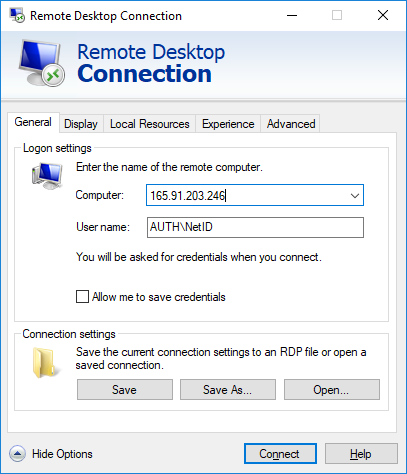
Step 5: Type in the IP address of the computer you wish to connect to.
Use AUTH\NetID as your username *Your Net ID (ex. joeaggie)*. Click Connect.
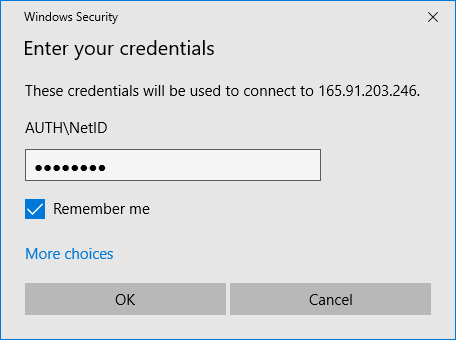
Step 6: Type your TAMU password in the Windows security box.
Check the box for Remember me. Click OK.
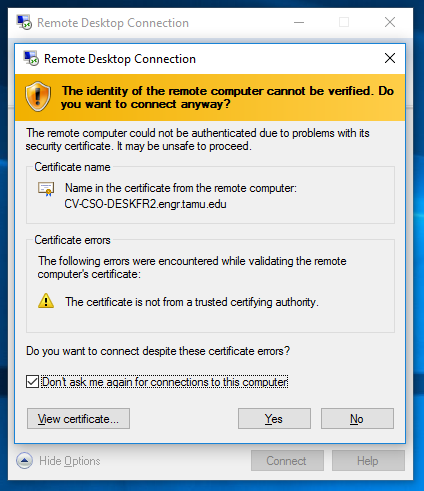
Step 7: Check the box for Don’t ask me again for connections to this computer.
Click Yes. Windows will immediately begin to logon to the remote computer.